Packaging an Application for Deployment


The first step to deploying your application to a BizTalk server is packaging it into an MSI, which can be done either manually in Visual Studio or through a command-line script.
Files Included in the MSI by Default
The Deployment Framework for BizTalk automatically includes all files referenced within your deployment project file. This includes orchestration assemblies, custom .NET assemblies, pipeline component assemblies, rule policy files, ESB itineraries, etc.
To include miscellaneous individual files (vs. an entire folder or a large number of files) in the MSI, you may simply include one or both of the ItemGroup's ExternalAssemblies (.NET DLL's to be installed in the GAC) or AdditionalFiles (miscellaneous files). They will be automatically included in the MSI.
The first packaging step is to copy all necessary files to a staging directory. You'll find this temporary staging directory under <deploymentProjectFolder>\obj\<solutionConfiguration>\redist. For example, <solutionRoot>\Deployment\obj\Release\redist. If you install your MSI on a server and find that a file is missing, then look to the staging directory on the machine that built the MSI. If a file doesn't get copied there, it will not be part of the MSI.
Including User-Defined Files in the MSI
In your deployment project file, the path to the staging directory is available in an MSBuild property named RedistDir (reference as $(RedistDir)). You may copy any extra files that you wish to include in the MSI inside a target named CustomRedist, placed after all Import elements. Remember that the Deployment Framework automatically copies all files referenced within the project file, so you only need to use CustomRedist if you have extra files that are not recognized by the Deployment Framework.
For example, the following target copies everything within the ..\TestFiles folder into the MSI staging folder:
<Target Name="CustomRedist">
<MakeDir Directories="$(RedistDir)\TestFiles" />
<!-- Force MSBuild to expand the item spec into physical file specs -->
<CreateItem Include="..\TestFiles\**\*.*">
<Output TaskParameter="Include" ItemName="TestFilesSourceGroup" />
</CreateItem>
<Copy DestinationFolder="$(RedistDir)\TestFiles\%(RecursiveDir)" SourceFiles="@(TestFilesSourceGroup)"/>
</Target>
Build an MSI from Visual Studio
With your BizTalk solution open in Visual Studio, building an MSI is as simple as a menu or toolbar click.
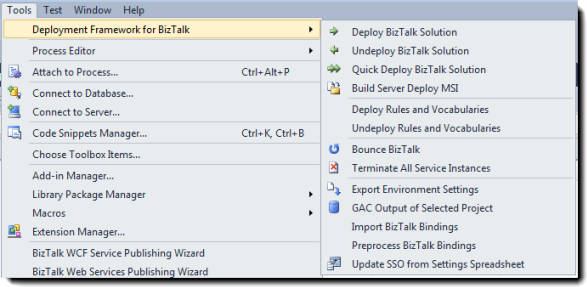
Click the menu item named "Build Server Deploy MSI". You'll also find the icon on the Deployment Framework toolbar. The Deployment Framework for BizTalk will proceed to create the MSI, and you can see the full output from the process in the Visual Studio Output window.
The resulting MSI will be saved to <deploymentProjectFolder>\bin\<solutionConfiguration>. For example, <solutionRoot>\Deployment\bin\Release.
Build an MSI from the Command Line
To build an MSI from the command-line, you need to invoke MSBuild.exe against your deployment project file (.btdfproj) using the following command format:
"<MSBuildPath>\MSBuild.exe" /p:<solutionConfiguration> /t:Installer "<pathToBTDFProj>"
For example:
"C:\Windows\Microsoft.NET\Framework\V4.0.30319\MSBuild.exe" /p:Configuration=Release /t:Installer "C:\TFS\MyBizTalkApp\Deployment\Deployment.btdfproj"
The resulting MSI will be saved to <deploymentProjectFolder>\bin\<solutionConfiguration>. For example, <solutionRoot>\Deployment\bin\Release.
Created with the Personal Edition of HelpNDoc: Free iPhone documentation generator